Monday, December 22, 2008

Stained Glass Cookies

I first discovered this recipe in my Better Homes & Gardens 100 Best Cookies magazine last year around Christmastime and decided that they were something that i had to try. They're actually called "Sugar Cookie Cutouts" in the magazine, but look like pretty stained glass. They looked so gorgeous in the magazine picture, but this recipe was definitely the most problem-recipe I used this Christmas. After making the recipe that came with it though, I think next time I'll use my never-fails-me-sugar-cookie-recipe for the cookie part. This recipe made dough that was way too soft to handle (even after adding extra flour), and the cookies spread to much during baking (even after re-chilling the cutouts right before baking. Oh, and next time I'll use smaller cut-outs too - the large ones were pretty, but there was definitely too much candy in the cookie. These ones were definitely more for decoration than for eating.

INGREDIENTS:
1/3 cup butter, softened
1/3 cup shortening
3/4 cup sugar
1 tsp baking powder
1 egg
1 tsp vanilla
2 cups all-purpose flour
Crushed Jolly Ranchers, Lifesavers, Butterscotch, etc. (I used Jolly Ranchers and some leftover Butterscotch candies I had in the pantry)
Meringue Powder Icing

DIRECTIONS:
In a medium mixing bowl beat butter and shortening with an electric mixer on medium to high speed for 30 seconds. Add sugar, baking powder, and a dash of salt. Beat until combined, scraping sides of bowl occasionally. Beat in egg and vanilla until combined. Beat in as much of the flour as you can with the mixer. Stir in any remaining flour with a wooden spoon. Cover; chill for 1 hour or until dough is easy to handle.

Preheat oven to 375°. Line a cookie sheet with foil and spray with the foil with cooking spray. On a lightly floured surface roll one portion of the dough at a time to a 1/4" thickness. Cut with cookie cutters. Place cutouts on lined cookie sheet. Using small cookie cutters or hors d'eouvre or fondant cutters, cut shapes from the center of the cookie. Fill cutouts with crushed candies (be careful not to get candies onto the cookie where you don't want them or they will bake into it).

Bake in preheated oven for 8 to 10 minutes or until edges are firm and bottoms are very light brown. Cool on cookie sheet 1 minute. Transfer cookies to a wire rack and let cool. Frost cookies with Meringue Powder Icing.


CREDIT: Better Homes & Gardens Special Interest Publication - "100 Best Cookies - Our Most Popular Holiday Recipes", p.106, c. 2007

Sunday, December 21, 2008

Sour Cream Sugar Cookies

I first made these sugar cookies last year, and they are absolutely delicious! I have since used this recipe a few other times for cut-out cookies and it never fails me. Perfect, soft, easy-to-work-with sugar cookies! The hint of lemon in the cookies keeps them from being too sweet.

INGREDIENTS:
1/2 cup butter, softened
1 cup sugar
1 tsp baking powder
1/4 tsp baking soda
1/2 cup sour cream
1 egg
1 tsp vanilla
1 tsp finely shredded lemon peel
3 1/2 cups flour**
Meringue Powder Icing

**Note that the original recipe only calls for 2 1/2 cups of flour - I find that I need 3 1/2 cups each time I make them.

DIRECTIONS:
In a large mixing bowl beat butter with electric mixer on medium to high speed for 30 seconds. Add sugar, baking powder, baking soda, and dash salt; beat until combined. Beat in sour cream, egg, vanilla, and lemon peel. Beat in as much of the flour as you can. Stir in remaining flour. Divide dough in half. Cover; chill for at least 1 hour.

Preheat oven to 375°. On a well-floured surface roll half of the dough at a time to a 1/8 - 1/4" thickness. Using cookie cutters, cut into desired shapes. Place cutouts 1" apart on an ungreased cookie sheet.

Bake in preheated oven for 7-8 minutes or until edges are firm and bottoms are lightly browned. Transfer cookies to wire racks; cool.

Spread cooled cookies with Meringue Powder Icing; let dry completely. Using a small clean paintbrush, paint designs on each cookie with food coloring.

CREDIT: Better Homes & Gardens Special Interest Publication - "100 Best Cookies - Our Most Popular Holiday Recipes", p.69, c. 2007

Gingerbread Men

I've been making this recipe now for a few years and can't remember where I got it from. The dough is usually extremely easy to work with, but we had such a wet winter that I had to add a couple of extra cups of flour because they were so sticky from the humidity. This is my favorite gingerbread cookie recipe.

INGREDIENTS:
1/3 cup shortening
1 cup packed brown sugar
1 1/2 cups (12-oz jar) dark molasses
2/3 cup cold water
7 cups all-purpose flour
2 tsp baking soda
1 tsp salt
1 tsp ground allspice
2 tsp ground ginger
2 tsp crushed cloves
2 tsp ground cinnamon
Decorations (raisins, red-hots, M&M;s, etc)

DIRECTIONS:
Mix shortening, brown sugar, and molasses thoroughly. Stir in 2/3 cup water. Blend flour, soda, salt, and spices; stir into molasses mixture. Chill for about 1 hour (up to overnight).

Line cookie sheet with parchment paper. Roll the dough about 1/4" thick. Cut with cookie cutters and place on prepared pan. Bake at 350° for 10-12 minutes. Cool slightly, then remove from baking sheet. When completely cool and ready to decorate, use Meringue Powder Icing as "glue" for the decorations.

Cookie Party!

I threw a cookie decorating party at my apartment today to help with some of the time-consuming decorating. Last year my family (except for one sister) traveled to Texas to spend Christmas with extended family. Our family tradition has always been to celebrate and open presents on Christmas Eve night. Since my sister and I were the only siblings still here in Georgia, Ashley and her husband came over and the 4 of us had a nice Christmas Eve dinner together. Afterward Ashley and I decorated some cookies I had baked. We had so much fun we decided that we need to make sure to have a Cookie Party the following Christmas with the rest of our sisters (there are 4 of us girls!). Tonight we decorated Gingerbread Men and Sugar Cookies.

My sister's boyfriend, Travis, posing with the undecorated cookies.


Progress.


Stacey was in charge of dipping the pretzels in chocolate.


Ashley putting the finishing touches on a nutcracker soldier cookie.


Vikki's humorous snowmen.

Saturday, December 20, 2008

Buckeye Cookies

These have got to be my all-time favorite cookie recipes! They're technically called "Peanut Butter Munchies" but I re-christened them "Buckeye Cookies". My mother-in-law makes fantastic buckeyes every year at Christmastime and these cookies remind me of them. They are a little time-consuming to make (I enlist a baking partner to help roll them out), and I would highly recommend investing in 2 different size cookie scoops if you plan on making these - I use a small (2 tsp) cookie scoop and a medium (1 1/2 Tbs) cookie scoop made by Oxo - they're absolutely wonderful and you'll wonder how you ever baked cookies without them!

INGREDIENTS:
1 1/2 cups all-purpose flour
1/2 cup unsweetened cocoa powder
1/2 tsp baking soda
1/2 cup butter, softened
1/2 cup granulated sugar
1/2 cup packed brown sugar
1/4 cup peanut butter
1 egg
1 Tbs milk
1 tsp vanilla
3/4 cup sifted powdered sugar
1/2 cup peanut butter
2 Tbs granulated sugar (to flatten cookies with)

DIRECTIONS:
Preheat oven to 350º. In a medium bowl stir together flour, cocoa powder, and baking soda; set aside.

In a large bowl beat together butter, 1/2 cup granulated sugar, brown sugar, and the 1/4 cup peanut butter until combined. Add egg, milk, and vanilla; beat well. Beat in as much of the flour mixture as you can. Stir in remaining flour mixture. Form the chocolate dough into 32 balls** about 1 1/4" in diameter (This is where I use the medium 1 1/2 Tbs cookie scoop, and they're not exactly 1 1/4" in diameter). Set aside.

For filling, combine powdered sugar and 1/2 cup peanut butter until smooth. Shape mixture into 32** balls about 3/4" in diameter (This is where I use the small 2 tsp cookie scoop - as with the chocolate dough balls, these are not exactly 3/4" in diameter).

On a work surface, slightly flatten a chocolate dough ball; top with a peanut butter ball. For each cookie, shape the chocolate dough over the peanut butter filling, completely covering the filling. Roll dough into a ball.

Place balls 2" apart on an ungreased cookie sheet. Lightly flatten with the bottom of a glass dipped in the 2 Tbs granulated sugar.

Bake cookies in preheated oven for 8 minutes or until just set and surface slightly cracks. Let stand 1 minute. Transfer to wire racks and cool.
**NOTE: Using the Small and Medium cookie scoops, I usually only get about 24 cookies from this recipe. Make sure that you have the same number of chocolate dough balls as you do peanut butter dough balls.

CREDIT: Better Homes & Gardens Special Interest Publication - "100 Best Cookies - Our Most Popular Holiday Recipes", p.68, c. 2007

Peanut Butter Blossoms


This is my Mom's recipe that she used to make every year at Christmas. Of course, I have to carry on the tradition! I made a double batch this year since my mother didn't have time to do any Christmas baking (oh, the humanity!!) and gave her a batch. Soft, moist, chewy, and deeee-lish!

INGREDIENTS:
1 can condensed milk
3/4 cup peanut butter
2 cups Bisquick
1 tsp vanilla
1 cup sugar (for rolling)
1 pkg chocolate kisses

DIRECTIONS:
Preheat oven to 375º. In a large mixing bowl, beat condensed milk and peanut butter until smooth. Add Bisquick and vanilla; mix well.

Shape into 1" balls (I use a 2 tsp cookie sand roll in sugar. Place 2" apart on an ungreased baking sheet. Bake for 6-8 minutes or until LIGHTLY browned (do not overbake). Immediately after removing from oven, press a chocolate kiss into the center of each ball. Let cool. Makes about 3 1/2 dozen.

CREDIT: My mother!

Christmas Toffee Bars

Christmas Time! My favorite time of year! It's a ginormous excuse to bake lots of cookies!! The Christmas Toffee Bars were a new addition to my holiday repertoire this year. They came out of the Holiday Cookies edition of Cuisine at Home - one of my favorite cooking magazines (although they don't typically have a lot of baking recipes in there, they offer tons of handy tips, reviews, and beautiful photos - I love to find yummy-looking photos of meals for Hubby to make for dinner!) My mom got me the special Holiday Cookies edition as a stocking stuffer but decided to give it to me before Christmas so that I could use it! :) These were a cinch to make and were delicious!

INGREDIENTS:
2 cups vanilla wafer cookies, crushed
3/4 cup brown sugar, divided
1/3 cup unsalted butter, melted
1/2 cup unsalted butter
1 cup semisweet chocolate chips
1/2 cup chopped nuts (pecans, walnuts, or almonds), toasted

DIRECTIONS:

Preheat oven to 350º. Butter a 9" x 13" glass baking dish.

Crush vanilla wafers in a resealable plastic bag using a rolling pin. Combine crushed cookies with 1/4 cup brown sugar and 1/3 cup melted butter in a bowl.

Press the mixture into the prepared dish, using a measuring cup to "tamp" it down. Bake for 8 minutes, or just until set.

Melt 1/2 cup butter and 1/2 cup brown sugar together in a saucepan, stirring to blend. Bring the mixture to a boil and boil 1 minute without stirring.

Immediately pour the mixture over the hot crust, then return the pan to the oven. Bake an additional 10 minutes, remove, and cool for 2 minutes.

Sprinkle the chocolate chips over the toffee and let stand until they're glossy, about 5 minutes. Spread the chocolate over the toffee using an offset spatula, then sprinkle the nuts on top. Cool bars completely.

Remove toffee from the pan. To break it into pieces, insert the tip of a paring knife into the toffee and twist the knife.

CREDIT: Cuisine at Home's Holiday Cookies - Gifts From Your Kitchen, p. 86, c. 2006

Sunday, November 30, 2008

Chocolate Velvet Pound Cake


Wanting to bring a special dessert to this year's Thanksgiving with the in-laws, I broke out my Southern Living Cookbook and finally narrowed it down to either the Orange-Pecan-Spice Pound Cake or the Chocolate Velvet Pound Cake. The Chocolate Velvet won, since neither Hubby nor I felt like running to the store to pick up oranges! It was absolutely delicious - light and moist - not at all like your typical heavy pound cake.

INGREDIENTS:
1 1/2 cups semisweet chocolate morsels
1/2 cup butter, softened
1 (16-oz) package light brown sugar
3 large eggs
2 cups all-purpose flour
1 tsp baking soda
1/2 tsp salt
1 (8-oz) container sour cream
1 cup hot water
2 tsp vanilla extract
1/4 cup powdered sugar
Chocolate Ganache

DIRECTIONS:
Melt semisweet chocolate morsels in a microwave-safe bowl at HIGH for 30-second intervals until melted (about 1 1/2 minutes total time). Stir until smooth.

Beat butter and brown sugar at medium speed with an electric mixer 5 minutes or until well blended. Add eggs, 1 at a time, beating just until blended after each addition. Add melted chocolate, beating just until blended.

Sift together flour, baking soda, and salt. Gradually add to chocolate mixture alternately with sour cream, beginning and ending with flour mixture. Beat at low speed just until blended after each addition. Gradually add 1 cup hot water in a slow, steady stream, beating at low speed just until blended. Stir in vanilla.

Pour batter into a greased and floured 10" tube pan. Bake at 350º for 60-65 minutes or until a long wooden pick inserted in center comes out clean. Cool in pan on a wire rack 15 minutes. Remove from pan, and let cool completely on wire rack.

GARNISH:
  • Sift powdered sugar over top of cake. Serve with Chocolate Ganache and ice cream. I also topped the cake with fresh raspberries (strawberries would be good, too.)
CREDIT: The All-New Ultimate Southern Living Cookbook, p. 152, c. 2006

Chocolate Ganache

This recipe goes with Chocolate Velvet Pound Cake.

INGREDIENTS:
1 (12-oz) package semisweet chocolate morsels
1/2 cup whipping cream
3 Tbs butter

DIRECTIONS:
Microwave chocolate morsels and whipping cream in a 2-quart glass bowl at MEDIUM (50% power) 2 1/3 - 3 minutes or until morsels begin to melt. Whisk until smooth. Whisk in butter, and let stand 30 minutes. Beat at medium speed with an electric mixer 3 to 4 minutes.

Yield: 1 1/2 cups

CREDIT: The All-New Ultimate Southern Living Cookbook, p. 152, c. 2006

Wednesday, November 26, 2008

Pumpkin Cake


When Hubby's office had their annual Thanksgiving party, he signed me up to make a dessert. In keeping with the season, I chose to do a pumpkin cake, although I did cheat and use canned frosting since I was so short on time!

INGREDIENTS:
2 cups white sugar
1 1/4 cups vegetable oil
1 tsp vanilla extract
2 cups canned pumpkin
4 eggs
2 cups all-purpose flour
3 tsp baking powder
2 tsp baking soda
1/4 tsp salt
2 tsp ground cinnamon

DIRECTIONS:
Preheat oven to 350
º. Grease and flour a two 9" round pans. Sift together the flour, baking powder, baking soda, salt and cinnamon. Set aside.

In a large bowl combine sugar and oil. Blend in vanilla and pumpkin, then beat in eggs one at a time. Gradually beat in flour mixture. Stir in nuts. Spread batter into prepared pan.


Bake in the preheated oven for 30 minutes, or until a toothpick inserted into the center of the cake comes out clean. Allow to cool.
Top with your favorite cream cheese frosting and sprinkle with cinnamon (I cheated and used canned frosting).

CREDIT: Submitted by "Sue Case" on Allrecipes.com

Wednesday, October 29, 2008

Pumpkin Chocolate Chip Cookies

When I was baking the Iced Pumpkin Cookies for my friend's Bake Walk I realized that I still had some leftover pumpkin. Not wanting the pumpkin to go to waste, I went ahead and whipped up these Pumpkin Chocolate Chip Cookies as well! I added a little bit of cayenne to give them a little more spice - they were delicious! Also very cake-like.

INGREDIENTS:
1 cup canned pumpkin
1 cup white sugar
1/2 cup vegetable oil
1 egg
2 cups all-purpose flour
2 tsp baking powder
2 tsp ground cinnamon
1/8 - 1/4 tsp cayenne pepper, depending on preference
1/2 tsp salt
1 tsp baking soda
1 tsp milk
1 Tbs vanilla extract
2 cups semisweet chocolate chips
1/2 cup chopped walnuts (optional)

DIRECTIONS:
Combine pumpkin, sugar, vegetable oil, and egg. In a separate bowl, stir together flour, baking powder, ground cinnamon, and salt. Dissolve the baking soda with the milk and stir in. Add flour mixture to pumpkin mixture and mix well.

Add vanilla, chocolate chips and nuts.

Drop by spoonful on greased cookie sheet and bake at 350º for approximately 10 minutes or until lightly brown and firm.

CREDIT: Submitted by "Jennifer" on Allrecipes.com

Iced Pumpkin Cookies

A friend of mine asked if I could bake something for the "Bake Walk" they were doing as part of the Fall Festival at her church at the end of October. I wanted to make something seasonal, so chose these pumpkin cookies. The only change I made was to add cinnamon to the icing. They're very cake-like!

INGREDIENTS:

2 1/2 cups all-purpose flour
1 tsp baking powder
1 tsp baking soda
2 tsp ground cinnamon
1/2 tsp ground nutmeg
1/2 tsp ground cloves
1/2 tsp salt
1/2 cup butter, softened
1 1/2 cups white sugar
1 cup canned pumpkin puree
1 egg
1 tsp vanilla extract

2 cups confectioners' sugar
3 Tbs milk
1 Tbs melted butter
1 tsp vanilla extract
cinnamon

DIRECTIONS:
Preheat oven to 350º. Combine flour, baking powder, baking soda, cinnamon, nutmeg, ground cloves, and salt; set aside.

In a medium bowl, cream together the 1/2 cup of butter and white sugar. Add pumpkin, egg, and 1 teaspoon vanilla to butter mixture, and beat until creamy. Mix in dry ingredients. Drop on cookie sheet by tablespoonfuls; flatten slightly.

Bake for 15 to 20 minutes in the preheated oven. Cool cookies, then drizzle glaze with fork.

To Make Glaze: Combine confectioners' sugar, milk, 1 tablespoon melted butter, and 1 teaspoon vanilla. Add milk as needed, to achieve drizzling consistency. Sprinkle in cinnamon and mix to taste.

CREDIT: Submitted by "Gina" on Allrecipes.com

Monday, October 27, 2008

Greek Lemon Cake

October 27th was mine and Hubby's 1 year wedding anniversary. We did not follow tradition in eating the top tier of our wedding cake on our anniversary because I've heard so many horror stories about how dry and tasteless the top tiers are after one year. Besides, that just gives me an excuse to bake us a fresh "top tier" for our anniversary! Our wedding cake was a lemon cake with raspberry filling and cream cheese frosting. Although I have the recipes that we used for our wedding cake, I wanted to try a new recipe, so chose Greek Lemon Cake with Lemon Cream Cheese Frosting.

INGREDIENTS:
3 cups cake flour
1 tsp baking soda
1/4 tsp salt
6 eggs
2 cups white sugar
1 cup butter, softened
2 tsp grated lemon zest
2 Tbs lemon juice
1 cup lemon yogurt
Lemon Cream Cheese Frosting

DIRECTIONS:
Preheat oven to 350º. Grease two 9" round pans (or one 10 inch tube pan). Sift the flour, baking soda, and salt together. Set mixture aside.

Separate the eggs (keep the yolks!). In a large bowl beat the egg whites until soft peaks form. Gradually add 1/2 cup of the sugar, beating until stiff glossy peaks form. Set aside.

Cream butter or margarine, 1 1/2 cups sugar, egg yolks, lemon zest, and lemon juice together until fluffy. Add flour mixture alternately with the yogurt to the egg yolk mixture. Gently fold in the egg whites and pour the batter into the prepared pan.

Bake at 350º for 50 to 60 minutes. Let cake cool in pan for 10 minutes, then turn out onto a rack to finish cooling.

CREDIT: Submitted by "Carol" on Allrecipes.com

Lemon Cream Cheese Frosting

This recipe goes with Greek Lemon Cake.

INGREDIENTS:
4 ounces cream cheese
1/4 cup butter, softened
1 cup powdered sugar
2 Tbs lemon juice
Up to 2 1/4 cups powdered sugar**

** NOTE: This is how much powdered sugar the original recipe calls for. I know that I did not use this much powdered sugar, but unfortunately, cannot remember how much I did use, since it has been so long that my computer has been down and haven't been able to post these!

DIRECTIONS:
Beat cream cheese and butter in a bowl until combined. Beat in powdered sugar and lemon juice.

Gradually beat in additional powdered sugar till frosting is of spreading consistency.

CREDIT: Submitted by "Amanda Howell" on Allrecipes.com

Saturday, October 25, 2008

Rainbow Cake

Our friend Jeff celebrated his 42nd birthday in October. There was a huge surprise birthday party for him and I had volunteered to make the cake. His wife said that his favorite flavor is white cake with chocolate icing, and Hubby had the bright - literally - idea of dyeing the cake and turning it into a rainbow cake.

This was a HUGE cake - a 12" square as the base, then tiers of a 10" round, 8" round, 6" round, and 3" round (or...jumbo cupcake on top!)

We used the "Cake Mix From Scratch & Variations" recipe from Allrecipes.com, except that we made 5 batches since we had such a large cake.

The recipes below are for a regular cake (one 9"x13" pan or two 9" rounds).

WHITE CAKE:
INGREDIENTS:
2 1/3 cups all-purpose flour
1 Tbs baking powder
3/4 tsp salt
1 1/2 cups white sugar
1/2 cup shortening
3 egg whites, beaten until soft peaks form
1 cup milk
1 tsp vanilla extract

DIRECTIONS:
In clean bowl, beat egg whites until soft peaks form.

In large bowl, sift together flour, baking powder, salt, and sugar. Cut in shortening until fine crumbs are formed.

Add milk and vanilla. Beat at low speed for 1 minute, then high for 2 minutes, scraping the bowl frequently. Fold in egg whites.

Pour batter into greased and floured pan. Bake in preheated 350º oven for 25 to 30 minutes (may be more or less, depending on the pan size used).

CREDIT: Submitted by "Janet" on Allrecipes.com

CHOCOLATE COOKIE BUTTERCREAM FROSTING:

INGREDIENTS:
1/4 cup butter
2 cups powdered sugar
3 Tbs cocoa powder
1 tsp vanilla extract
2 Tbs milk

DIRECTIONS:
Mix together all ingredients. May need to add more milk (slowly) until frosting reaches a spreadable consistency.

NOTE: When I made this, I also added 2 squares of melted unsweetened chocolate to enhance the chocolate flavor and decrease the sweetness.

CREDIT: Submitted by "Nancy Dorman" on Allrecipes.com


RAINBOW CAKE METHOD:
We can't take credit for the rainbow cake idea. Hubby is a member of the Something Awful Forums and got the idea from this thread. The vertical stripes look difficult, but are rather easy, if you follow the proportions outlined below.

How Do I Know How Much Batter To Dye Each Color?
This cake took all night and I enlisted Hubby's help. We began by calculating - yes, calculating - exactly how much of each color batter would go into each pan. We chose to use 5 colors - red, orange, yellow, green, and blue. In order for the bands of color to be about equal proportional, we actually had to use more of the blue (the outer band) than the red (the inner band).

Here are the percentages that we used of each color, with red being the inside band and blue the outside band:
Red - 10%
Orange - 15%
Yellow - 20%
Green - 25%
Blue - 30%

I'll go ahead and include our "master table" that we used to know how much of each color to use in each pan. Note that this probably won't make sense, but hopefully it will help!

The easiest way is to determine the total batter capacity of the pan and multiply the total capacity by the percentage of cake batter based on color.

Example: An 8" round pan holds 3 cups of batter. 3 cups x 10% red = 0.3 cups or approximately 1/3 cup red batter. 3 cups x 15% orange = 0.45 cups or approximately 1/2 cup orange batter.

Ok, So How Do I Get Those Cool Vertical Stripes?
Ok, now that we know how much of the batter to dye each color, let's go on to the method. Once you have all of your colored batter separated and your pans prepared, pour your first color directly into the center of the pan (your first color is the one towards the outside of the cake and the one that has the most batter from your calculations). Continue to pour the rest of the colors directly into the center of the pan until you have poured all of the batter in. Now, very carefully transfer to the oven and bake - it's that easy! Or, at least, I can say that it was easy since Hubby did that part!

Saturday, October 4, 2008

Poppy Seed Cake

My mother, the quintessential chocoholic, surprised me this year by not wanting a chocolate birthday cake. She requested her Aunt Alma's Poppy Seed Cake. After calling a few family members, we were able to dig up the recipe.

POPPY SEED CAKE
INGREDIENTS:

2 cups flour (sifted)
1 1/2 cups sugar
1/2 tsp salt
2 tsp baking powder
4 egg whites (save yolks for filling)
1 tsp vanilla
1/2 cup poppy seeds (2.6 oz bottle)
1/2 cup butter, softened
1 cup milk

DIRECTIONS:
In small bowl, sift together flour, salt, and baking powder. Mix in poppy seeds.

In large bowl, cream butter and sugar. Stir in vanilla and 1/2 cup milk; mix until blended. Add flour mixture alternating with remainder of milk, beginning and ending with flour mixture.

In separate bowl, beat egg whites until soft peaks form. Gradually beat in 1/4 cup sugar. Fold into other mixture. DO NOT BEAT.

Grease and flour either 3 - 8" round pans; or 2 - 9" round pans. Pour batter evenly into pans and bake at 350º for 15 to 20 minutes, or until very lightly brown. Cool completely.


CUSTARD FILLING
INGREDIENTS:
3 cups milk
1 cup sugar
9 Tbs corn starch
4 egg yolks
1 1/2 tsp vanilla
1 cup nuts (optional)
1/3 stick butter

In large saucepan, mix sugar and corn starch together.

In separate bowl, beat egg yolks with milk; add to sugar mixture.

Cook over medium heat stirring constantly until filling is a pudding consistency.

Cool and spread between layers of the cake reserving a spoonful to dollop on top of iced cake for decoration.


ASSEMBLY:
Even though traditionally, the custard is meant to be a filling and the cake to be topped with buttercream icing, Great Aunt Alma likes the custard so much that she tops the whole cake with it! After custard has cooled, spread it between the layers of the cake and on the tops and sides of the cake. Keep cake refrigerated.

Sunday, September 14, 2008

Flourless Chocolate Cake

I've made this a couple times now when we've had company coming over. It's surprisingly quick and easy and tastes delicious! Very rich.

INGREDIENTS:
1/3 cup water
1/2 cup sugar
1/2 cup unsalted butter, cut into 8 pieces
12 oz. semi- or bittersweet chocolate, chopped into pieces
1/3 cup orange liqueur
6 eggs

DIRECTIONS:
Preheat oven to 325º; prepare an 8" round cake pan.

Bring water and sugar to a boil, stirring to dissolve sugar.

Off heat, add butter and chopped chocolate. Let sit 2 minutes to melt; stir to smooth.

Whisk in liqueur, then the eggs, one at a time. Pour batter into prepared cake pan, place it in a roasting pan, then add warm water to the roasting pan. Bake cake 40-45 minutes. Cool and unmold.

GARNISH:
  • Top with a dollop of whipped cream and serve with fresh raspberries.
CREDIT: I have had this recipe printed out for a couple of years now and only know that it was a free recipe from the Cuisine at Home website. I am not able to find the recipe on the site any longer.

Sunday, August 17, 2008

Hayley's Caramel Cupcakes

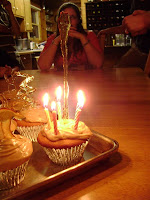
My sister, Hayley, celebrated her 17th birthday in August. The only request she had for her cake was caramel. I spent days researching to find the PERFECT recipes for my caramel concoction! She loved them and was so surprised by the hard caramel candy and jumbo cupcakes!

This Cupcake recipe actually uses a combination of 4 different recipes (assembly instructions at end):
1) Double Caramel Cake
2) Caramel Frosting V
3) Dulce de Leche Filling (optional)
4) Caramel Sticks (optional)


DOUBLE CARAMEL CAKE
INGREDIENTS:

1/3 cup plus 1 1/4 cups granulated sugar, divided use
1/4 cup boiling water
3/4 cup butter or margarine
3 eggs
3 cups sifted cake flour
3 1/2 tsp baking powder
1 tsp salt
1 cup milk
1 tsp vanilla extract

DIRECTIONS:
Melt the 1/3 cup sugar in a heavy skillet, stirring constantly until deep-brown syrup is formed - a process called caramelization. Remove from heat and slowly stir in boiling water, being careful that steam does not burn your hand. Set syrup aside to cool.

Preheat oven to 375ºF. Line jumbo cupcake/muffin pan with 12 liners.

Cream butter in bowl of electric mixer. Add 1 1/4 cups sugar and continue to beat until light and fluffy. Add eggs one at a time, beating until each is well-incorporated. Stir in 4 tablespoons of the reserved syrup.

Sift together the cake flour, baking powder and salt. Combine milk and vanilla. Add flour mixture to the batter alternately with the milk mixture, beginning and ending with the flour mixture. Beat until smooth. Divide batter evenly among the cupcake liners and bake 20 minutes, or until wooden toothpick inserted in the center comes out clean.

Remove pans from oven and let stand about 5 minutes, then turn cupcakes out to cook onto a wire rack. Cool completely.

CREDIT: "The Cake That Broke My Will post" from the Culinary Concoctions by Peabody blog


CARAMEL FROSTING V
INGREDIENTS:
1 pound light brown sugar
1 cup heavy whipping cream
1/2 tsp baking soda
1/2 cup butter

DIRECTIONS:
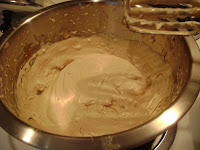
In a medium, heavy saucepan, bring the sugar and cream to a rolling boil. Boil one minute. Add soda, and boil one more minute. Remove from heat. Add butter, but DO NOT STIR YET. Let the mixture cool. Beat well.

NOTES:
It is extremely important to leave the butter alone! I actually cut my butter into smaller pieces so that it would be easier to beat after it chilled. I left it in the refrigerator overnight and was able to beat it straight out of the fridge - I know some others had left comments on the recipe that they had to let it sit out for about half an hour. It does take a serious mixer to blend this at first since it's so sticky, but it's well worth the effort!

CREDIT: Submitted by "Carol" on
Allrecipes.com


DULCE DE LECHE FILLING
INGRED
IENTS:
1 can sweetened condensed milk

DIRECTIONS:

Remove label from the can. Place UNOPENED can in a deep pot of water, making sure the water is at least 3-4 inches over the top of the can. Bring water to a boil and boil steadily for 3 hours. DO NOT let the water level get below the can. It is important to keep the water level above the can, or the can could explode. It is a good idea to set a timer as a reminder to check the level and add water every 15 minutes.

After 3 hours, turn off heat and allow water to cool. Remove can and refrigerate until cold before opening can. Store in refrigerator.


CARAMEL STICKS
INGREDIENTS:
1/4 cup water
1 cup sugar
2 Tbs light corn syrup

DIRECTIONS:
Line a baking sheet with parchment paper coated with butter or pan spray.

Combine the water, sugar, and corn syrup in a medium saucepan. Stir them together with your fingers, making sure there are no lumps. Brush down the inside of the pan with a little water, using your hand to feel for any stray granules of sugar.

Cover the saucepan and place it over medium heat for 4 minutes. After 4 minutes, remove the lid, increase the heat to high, and bring to a boil. Do not stir from this point on. Keep an eye on the pan - it will be very bubbly. When stray sugar crystals appear on the side of the pan, brush them down with a clean, wet pastry brush.

Insert a candy thermometer. When the temperature reaches 300°, lower the heat to medium. Continue to cook the sugar until it reaches 325; this will happen quickly. It will be golden brown. At 325°, remove the pot from the heat and let it sit for 1 minute, or until the bubbles subside.

Let the caramel cool to 300°, 5-8 minutes. It should be thick but still liquid, like molasses. Scoop a spoonful of the caramel and let it fall back into the pot. If it flows in a smooth steady stream, it is ready to use. If it drips, it's still too hot.

Carefully scoop out a spoonful of the caramel and position it about 6 inches above the prepared baking sheet. Pour the caramel off the spoon across the baking sheet into desired shapes. The caramel will harden immediately.

If the caramel becomes too cool to work with before you finish making all of the sticks, reheat it. If it has hardened completely, smash it up and place the pan over medium heat. Cook, stirring for 3-4 minutes. The temperature should not exceed 300°.

CREDIT: Sherry Yard, The Secrets of Baking, p. 54, c. 2003

ASSEMBLY:
FILLING:
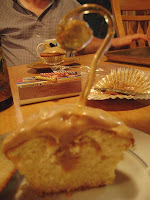
Make sure that cupcakes are completely cooled. Fill a pastry bag with a medium round tip (I used tip 7 from Wilton)
with the Dulce de Leche. Poke the tip into the top of a cupcake and squeeze a small amount of Dulce de Leche into the middle of the cupcake. If you do not have a pastry bag, you can use a paring knife to cut out a small "cone" from the top of the cupcake, spoon a small amount of Dulce de Leche into the hole and plug the opening back up with the "cone" cut from the cake.
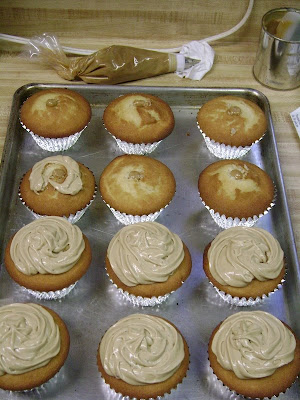
FROSTING:
Fill a pastry bag with a large star tip (I used tip
1M from Wilton) with the Caramel Frosting. Pipe onto the top of the cupcake in a circular motion, starting from the outside going inward.

GARNISH:
Stand up shapes and pieces of the Caramel Stick Recipe.

Wednesday, July 30, 2008

Strawberry Fields Forever Cake

My dad requested a strawberry cake for his birthday. I searched everywhere on my quest to find a recipe for a homemade strawberry cake that did not include white cake mix! I gleaned this recipe from the Honeyed Hashette blog - her photos looked so yummy, I just had to make it!


INGREDIENTS:

2 3/4 cups sifted cake flour
2 1/2 tsp baking powder
1 cup butter, softened
1 Tbs vegetable oil
1 3oz. package strawberry Jell-O
2 cups sugar
4 eggs, room temperature
1 cup whole milk
1 Tbs vanilla extract
1/2 cup frozen sweetened strawberries, puréed
Strawberry Cream Cheese Icing
Strawberry Filling

DIRECTIONS:
Preheat oven to 350°. Grease and flour 2 (9-inch) round cake pans.

In large bowl, cream together butter, sugar and gelatin until light and fluffy. Beat in eggs one at a time, mixing well after each. Combine the flour and baking powder in medium bowl. Add to batter, alternating with milk until flour and milk are incorporated. Blend in vanilla and strawberry purée.

Pour batter evenly into prepared pans. Bake for 30-35 minutes or until a wooden pick inserted in center comes out clean. Cool in pans on wire racks 10 minutes; remove from pans, and cool completely on wire racks.

ASSEMBLY:
Place 1 cake layer on a serving plate; spread top with Strawberry Filling. Spread Strawberry Cream Cheese Icing evenly over filling on cake layer. Top with second cake layer; spread top with Strawberry Filling. Spread remaining Strawberry Cream Cheese Icing on top and sides of cake. Garnish, if desired.

GARNISH:

Sugar-Frosted Strawberries (Using a pastry brush, coat fresh, clean strawberries with egg white, then roll in sugar. Let dry on wax paper for 2 hours. NOTE: Do this step just before serving as frosted strawberries do not refrigerate well.)

CREDIT: "Strawberry Cupcake Fields Forever post" from the Honeyed Hashette blog

Strawberry Filling

This recipe goes with Strawberry Fields Forever Cake.

I wanted to jazz up my dad's strawberry birthday cake a little bit, so I made up some strawberry filling to go on top of each cake layer with some strawberry purée I had leftover from the cake and icing. This can also be used to drizzle over the cake and/or plate as a garnish.

INGREDIENTS:
1 cup frozen sweetened strawberries, puréed
1 Tbs cornstarch

DIRECTIONS:
In small saucepan, bring puréed strawberries to a boil, stirring constantly. Dissolve cornstarch into 1/2 Tbs warm water and pour into boiling strawberry mixture, stirring until thickened. Add more cornstarch (dissolved) if necessary to thicken more. Cool and refrigerate until use.

Strawberry Cream Cheese Icing

This recipe goes with Strawberry Fields Forever Cake.

Since our printer was not hooked up when I was making this cake, I jotted the recipe down on paper instead of printing it from the Honeyed Hashette blog. The icing that I made was so soft and fluffy that it was actually too soft for the cake - on the drive to my dad's house, the top layer of the cake kept sliding off and I had to do some major cake resuscitation when I arrived. I mentioned to my husband that the recipe's 1 1/2 cups of butter was a lot and that next time I'll cut it down to 1/2 cup so it won't be so soft. Well, lo and behold, when I jumped online to add the recipe to my blog, I realize that the recipe DID actually only call for 1/2 cup of butter and I had mistakenly written down 1 1/2 cups butter! Either way, the icing is delicious!!

Strawberry Cream Cheese Icing
INGREDIENTS:
2 8 oz. packages of cream cheese, softened
1/2 cup butter, softened
2 cups confectioner's sugar
1 cup frozen sweetened strawberries, puréed

DIRECTIONS:
Blend cream cheese and butter together until smooth and creamy. Add sugar and blend well. Add strawberry purée and blend well. Refrigerate until use.

CREDIT: "Strawberry Cupcake Fields Forever post" from the Honeyed Hashette blog

Sunday, July 6, 2008

Shenandoah Valley Blueberry Cake

We're housesitting for some friends right now and they have blueberry bushes brimming with fresh blueberries just waiting to be baked into something yummy! I found this recipe in my new book, "Southern Cakes", and had to try it out.

INGREDIENTS:
1 2/3 cups all-purpose flour
1 1/2 tsp baking powder
1/4 tsp salt
1/3 cup butter, softened
3/4 cup plus 2 Tbs sugar
1 egg
1/3 cup milk
1 cup fresh or frozen blueberries (do not thaw)

DIRECTIONS:
Preheat oven to 375°, and generously grease a 9-inch square or round pan.
Is a medium bowl, combine the butter and sugar, and beat with a mixer at high speed until well combined. Add the egg and beat well for 1 to 2 minutes, stopping to scrape down the bowl, until the mixture is smooth and light.

Combine the flour, baking powder, and salt in a small bowl, and stir with a fork to mix well. Stir in half the flour mixture into the butter mixture, then half the milk, mixing just enough to keep the batter fairly smooth and well combined. Add the remaining flour, then the rest of the milk, mixing gently. Stir in the blueberries.

Scrape the batter into the prepared pan and bake at 375° for 30 minutes, or until the cake is golden, springs back when touched gently in the center, and is pulling away from the sides of the pan.

CREDIT: Nancie McDermott, Southern Cakes, p. 124, c. 2007

Saturday, July 5, 2008

Ricotta Cheese Cookies

I had some ricotta cheese left over that I needed to use up before it expired and found this recipe on Allrecipes.com. I haven't tasted them yet because I've just had oral surgery and am on a liquid diet for a few days, but my family loves them!

INGREDIENTS:
2 cups white sugar
1 cup butter, softened
15 ounces ricotta cheese
2 tsp vanilla extract
2 eggs
4 cups all-purpose flour
2 Tbs baking powder
1 tsp salt

1 1/2 cups confectioners' sugar
3 Tbs milk

DIRECTIONS:
Preheat oven to 350°. Line baking sheets with parchment paper.

In a large bow, with the mixer a low speed, beat the sugar and butter until combined. Increase speed to high and beat until light and fluffy (about 5 minutes). Reduce speed to medium and beat in the ricotta, vanilla and eggs.

Reduce speed to low. Add flour, baking powder and salt; beat until dough forms.
Drop dough by level tablespoons, about 2 inches apart; onto the prepared baking sheets. Bake at 350° for about 15 minutes or until cookies are very lightly golden (cookies will be soft). With spatula, remove cookies to wire rack to cool.

When cookies are cool, prepare icing**. In small bowl, stir confectioners' sugar and milk until smooth. With small spreader, spread icing on cookies.

** I did not have any milk, so I improvised on the icing. I made 6 different flavors:

  • lemon (using lemon juice)
  • orange (using orange juice that was strained through mesh to separate the pulp)
  • pomegranate (using pomegranate juice)
  • Irish cream (using a few drops of Irish cream oil and some Irish cream flavored coffee creamer)
  • vanilla maple (using some vanilla extract and real maple syrup)
  • cocoa almond (using cacao liqueur, almond extract, and half and half)

CREDIT: Submitted by "LindaK" on Allrecipes.com

Friday, July 4, 2008

Cookie Bouquet

My sister gave me this KitchenAid mixer for my birthday, and her only condition was that she gets the first thing that I make with it. Hmm...I knew that this had to be something good. She's a chocolate fan, but I've already been doing so much chocolate lately, I thought I'd try a Cookie Bouquet. After scouring the internet for days searching for the perfect recipe, I finally found it. I used the "Michelle Bommarito’s Sugar Cookies For Sticks" recipe that I found on the Cookie Madness blog.

INGREDIENTS:
3 cups all-purpose flour
1 tsp baking powder
2 sticks butter, unsalted, softened
1 cup granulated sugar
1 large egg
1/2 tsp kosher salt
1 tsp vanilla extract
dash of almond extract
Meringue-Powder Icing

DIRECTIONS:
Sift together the flour and baking powder. In a mixing bowl, beat the butter and sugar until light and fluffy. Stir in the egg, salt and both extracts.

Slowly add flour mixture (1 cup at a time) and stir until incorporated

Form the dough into a disc and wrap in plastic wrap. Refrigerate for at least 1 hour. (I found that it needed to refrigerate overnight in my refrigerator.)

Preheat oven to 375°. Roll the dough onto a lightly floured surface to approximately 5/8″ thick. Cut the cookies into shapes and place the cut cookie shape on a parchment lined cookie; Poke a stick into cookies.

Bake the cookies for approximately 8-10 minutes or until the edges begin to turn golden brown in color. Remove cookies from the oven and allow to cool on a wire rack for 5 minutes.

THE PROCESS:

I tried two different methods of putting the stick into the cookie. The first was to press the stick into the back of the cookie, then cover it with a bit of rolled dough and press it together. This method tended to let the cookies "spin" around the stick after they were baked.


The second was to carefully push the stick straight up into the cookie. I think that this method worked the best, but I had to be really careful to go STRAIGHT and level into the cookie. I had a few that were slightly at an angle and had to re-roll the cookies.


Cookies cooling on their sticks after being baked. Be sure that the cookies are COMPLETELY cool before trying to frost them.


My friend, Stacey, was in town and helped decorate the cookies. For this particular icing recipe, we found the easiest method is to use a knife to frost the cookies, then gently shake the cookies back and forth to smooth out the icing before it sets. This seems so much easier to me then the outline-and-flood method!

Our cookies setting out to dry. We frosted each cookie with a different color and let that set. The dots in the middle of the flowers were "painted" on with a cookie stick. When that was dry, we used a piping bag to pipe on the white outline. Be sure to let the icing COMPLETELY dry (preferably overnight) before bagging them up or stacking them.

Once the cookies were dry, we stuck them inside a clear cookie/treat bag (you can find them at large craft stores in the baking aisle) and wrapped the bottom with a silver twist tie. To make our bouquet, we put floral foam into the bottom of a 6" clay pot (I used a 6" round ball). We then stuck the cookies in at various heights and angles, then stuffed the moss around the bottom of the sticks to cover the foam. In hindsight, it would have been MUCH easier to lay the moss down, then stick the cookies in. A pretty pink bow was the finishing touch.

Ashley with her cookie bouquet! She loved it! :)


CREDIT: "Michelle Bommarito’s Sugar Cookies For Sticks" from the Cookie Madness blog